Shockwave Lab SL157 SL-157 LED Blaster Kits for Studio Series SS-56 Shockwave Upgrade Kit
Features:
*Note: An upgraded version of SL-70 kit in which the magnetic switch is being used.
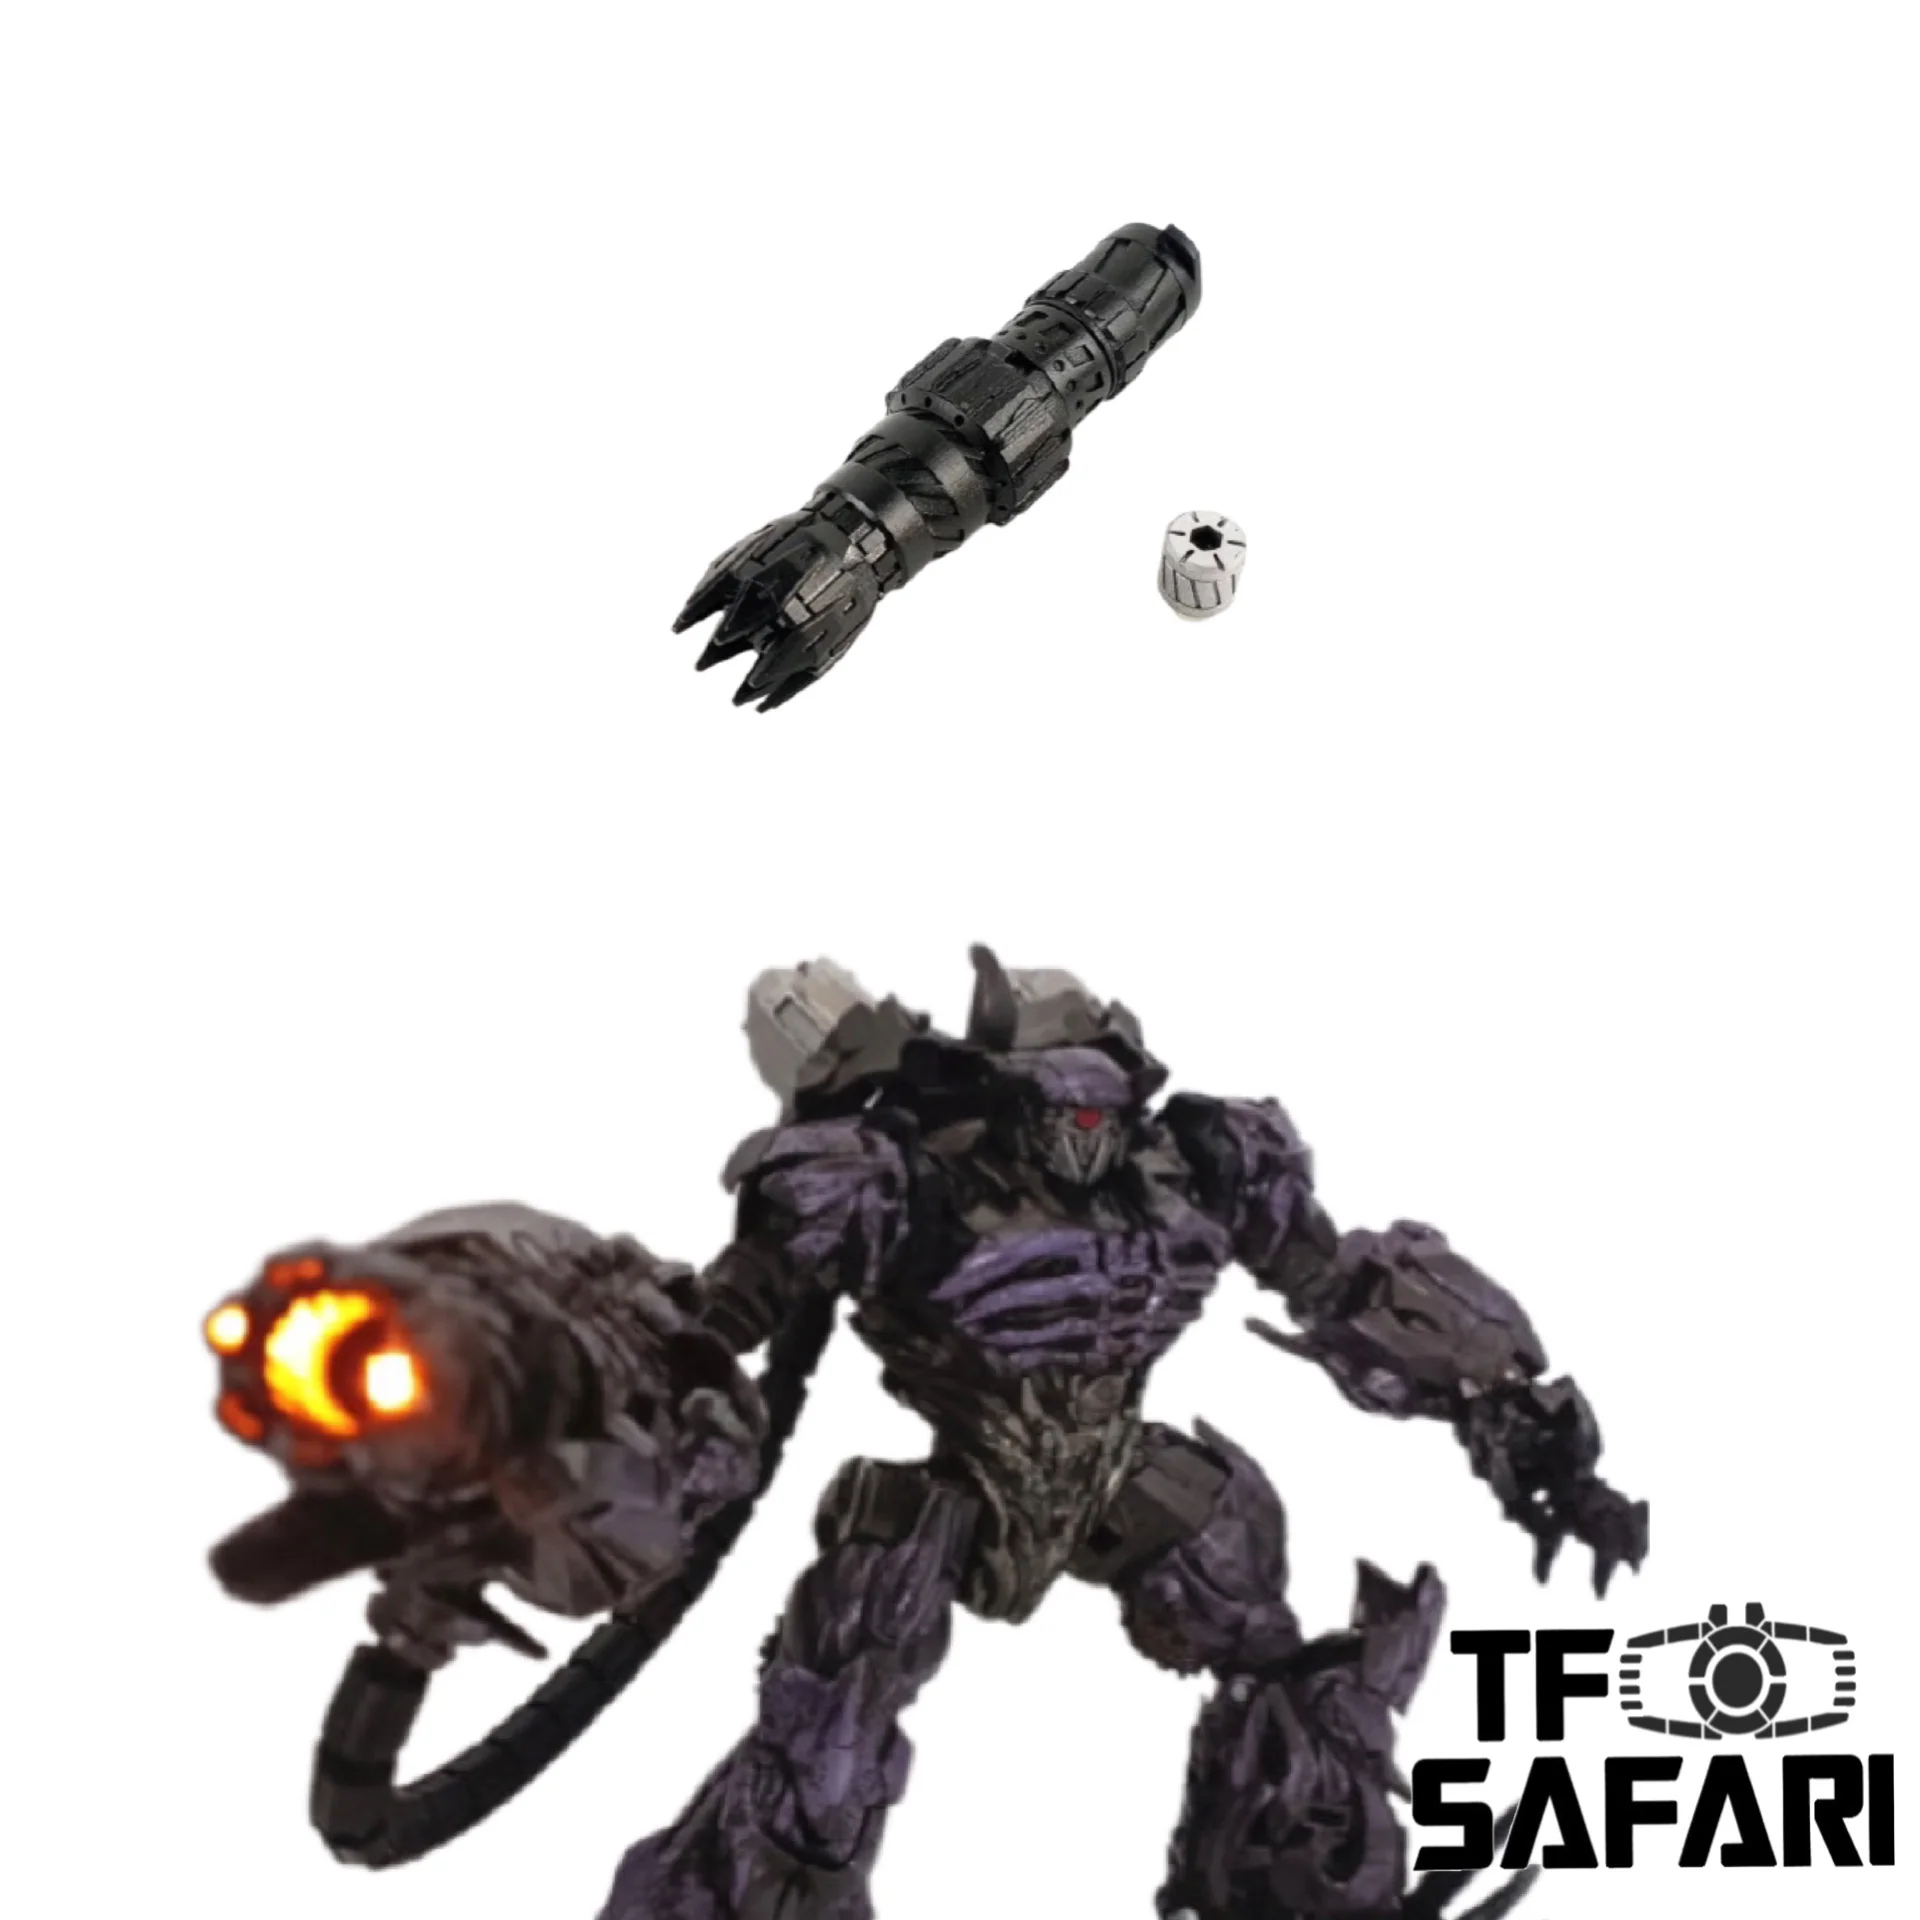
Shockwave lab's weapon for the designer himself ^^ . The set is painted in black and comes with LED lights (as well as the button cells) to give an extraordinary orange light effect to the new mighty weapon for soundwave!
The whole set includes:
3 x Blaster parts
2 x Button cells (The set uses 1x CR927)
TFSAFARI Instruction - How to install the cannon:
1.Dismantle the right arm on the figure (2 screws are needed to be removed ).
2.Replace the original blaster with the base part of the blaster, and then reassembly the arm.
3. Put the button cells into the LED parts, test the light effect (pay attention to the positive and negative ends)
4.Insert the LED part into the blaster part, make sure the switch is fit to the reserved slot on the blaster part.
5. Connect the blaster part to the base part, find the 3 connectors, plug in and rotate counterclockwisely to lock.

*Note:
Paintings on the connecting parts may peel off a little bit after use. This cant be considered as the defects of the products, pls understand.
Status:
2022-11 In stock.
Parameters:
| Producer | Shockwave Lab |
| Size | Fits to SS56 Shockwave |
| Material | 3D Printing resin |
| Shipment | From China |
| Note | Upgrade Kit |
Features:
*Note: An upgraded version of SL-70 kit in which the magnetic switch is being used.
Shockwave lab's weapon for the designer himself ^^ . The set is painted in black and comes with LED lights (as well as the button cells) to give an extraordinary orange light effect to the new mighty weapon for soundwave!
The whole set includes:
3 x Blaster parts
2 x Button cells (The set uses 1x CR927)
TFSAFARI Instruction - How to install the cannon:
1.Dismantle the right arm on the figure (2 screws are needed to be removed ).
2.Replace the original blaster with the base part of the blaster, and then reassembly the arm.
3. Put the button cells into the LED parts, test the light effect (pay attention to the positive and negative ends)
4.Insert the LED part into the blaster part, make sure the switch is fit to the reserved slot on the blaster part.
5. Connect the blaster part to the base part, find the 3 connectors, plug in and rotate counterclockwisely to lock.
*Note:
Paintings on the connecting parts may peel off a little bit after use. This cant be considered as the defects of the products, pls understand.
Status:
2022-11 In stock.
Parameters:
| Producer | Shockwave Lab |
| Size | Fits to SS56 Shockwave |
| Material | 3D Printing resin |
| Shipment | From China |
| Note | Upgrade Kit |
Original: $15.99
-65%$15.99
$5.60Description
Features:
*Note: An upgraded version of SL-70 kit in which the magnetic switch is being used.
Shockwave lab's weapon for the designer himself ^^ . The set is painted in black and comes with LED lights (as well as the button cells) to give an extraordinary orange light effect to the new mighty weapon for soundwave!
The whole set includes:
3 x Blaster parts
2 x Button cells (The set uses 1x CR927)
TFSAFARI Instruction - How to install the cannon:
1.Dismantle the right arm on the figure (2 screws are needed to be removed ).
2.Replace the original blaster with the base part of the blaster, and then reassembly the arm.
3. Put the button cells into the LED parts, test the light effect (pay attention to the positive and negative ends)
4.Insert the LED part into the blaster part, make sure the switch is fit to the reserved slot on the blaster part.
5. Connect the blaster part to the base part, find the 3 connectors, plug in and rotate counterclockwisely to lock.
*Note:
Paintings on the connecting parts may peel off a little bit after use. This cant be considered as the defects of the products, pls understand.
Status:
2022-11 In stock.
Parameters:
| Producer | Shockwave Lab |
| Size | Fits to SS56 Shockwave |
| Material | 3D Printing resin |
| Shipment | From China |
| Note | Upgrade Kit |